You don't need a team to handle stock safely. You need a system.
That's not a reassuring platitude. It's the difference between a productive day on the farm and a week off your feet with a wrecked shoulder or a kick to the knee. When you're working cattle alone, the margin for error is smaller. There's no one to open the gate while you move the mob, no one to pull the crush lever while you hold the head. Everything falls to you, and if the setup isn't right, your body ends up taking the slack.
Handling cattle yards solo is something thousands of Kiwi farmers do every week. Done well, it's absolutely manageable. Done badly, it accumulates. Small inefficiencies become habits, and habits become injuries. This guide covers the practical stuff, what actually makes solo stock handling safer and less stressful, day in and day out.
Set Your Yard Up to Work for One Person
Most cattle yard accidents aren't caused by one catastrophic moment. They're caused by a layout that forces the wrong movement at the wrong time.
When you're working alone, every step you take around the outside of a yard costs you time and puts you in proximity to stock that can react unpredictably. The goal is to design your yard so that you're moving stock through the system without crossing your own path, doubling back, or reaching across gates.
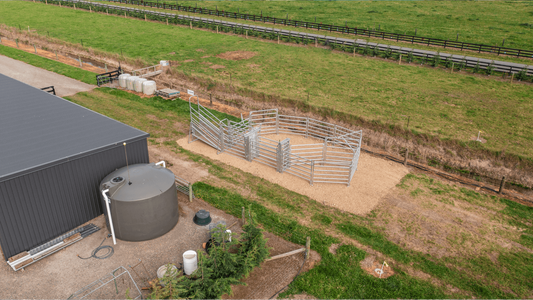
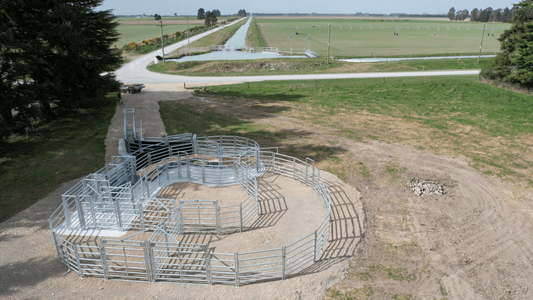
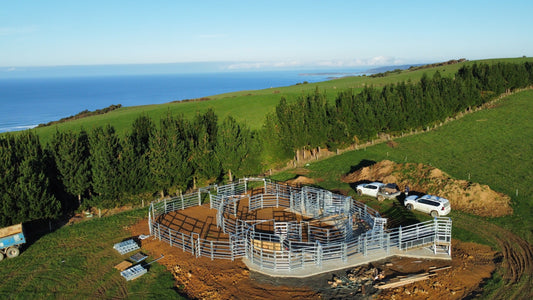
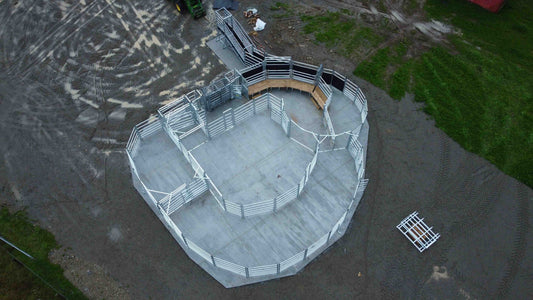
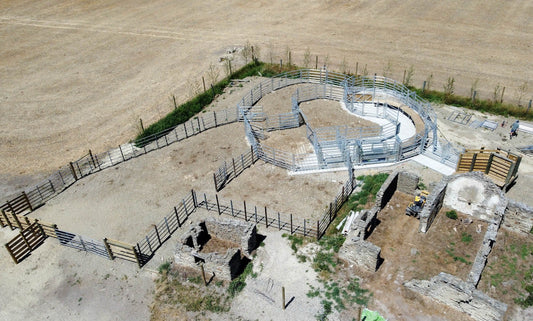
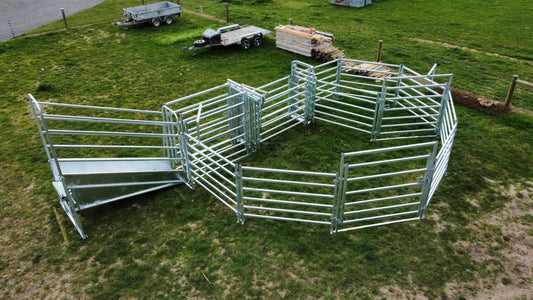
A circular forcing pen is one of the most practical things you can do for solo work. Stock move naturally when they follow a curve. They don't bunch up and resist the way they do in a square corner, which means less pressure is required from you. You're guiding rather than pushing, which is a lot easier when you're the only one doing it.
Gate placement matters just as much. Think through where you need to be standing when each gate opens or closes, and whether you can get there without walking through a mob. On a well-configured yard, you should be able to move from drafter to forcing pen to crush without putting yourself in a position you wouldn't want to be in if an animal got jumpy.
If you're building new or upgrading, it's worth having a proper conversation about flow before you confirm a layout. Not just what fits the section, but what actually works when one person is running the whole thing.
Know Where You Are Relative to the Stock, Always
There's a concept in stock handling called the flight zone, the point at which an animal switches from watching you to moving away from you. Most farmers understand it instinctively even if they've never heard it named. When you're working in a team, someone else is usually holding the edge of that zone while you work the gate. Solo, you're doing both.
The practical upshot is that you need to stay sharper about positioning when you're alone. Keep your body angled, not square-on, when you're encouraging stock to move. Move deliberately rather than quickly. Quick movement gets read as threat, which causes bunching, which creates pressure you then have to manage by yourself.
Stay out of the blind spot directly behind cattle, and be especially careful in the crush approach alley where stock are concentrated and options are limited. This isn't about knowing the rulebook. It's about reducing the moments where you're caught in a bad spot with no one to redirect the situation.
Your Crush Is the Most Important Tool You Have for Solo Work
If there's one piece of equipment that changes what's possible when handling cattle yards solo, it's a well-designed crush.
A good crush holds the animal firmly enough that you can do what needs doing without rushing and without needing a second pair of hands to keep things under control. A poorly designed one turns every single-operator job into a two-person job, and if you don't have a second person, you start cutting corners on restraint. That's when things go wrong.
Look for a crush with easy single-operator controls. You want to be able to close the head bail, adjust side pressure, and release the animal without walking around the unit or reaching past the animal to operate a second mechanism. The less movement required from you while the animal is in the crush, the better.
Solid build quality matters here too. Not just the gauge of the steel but the depth of the rail profile. Lateral pressure from a stressed animal is substantial, and a crush that flexes or rattles under load creates unpredictability at exactly the moment you need things locked in. Our cattle rail runs 47mm deep, which gives it 15% more resistance to that lateral load than most alternatives. In practice, it means the crush behaves the same on the fifth animal as it did on the first.
Get Your Race and Drafting Gate Working With You
A well-set race is doing about half the work for you on a solo shift. When stock funnel through cleanly without backing up or turning, you're managing flow rather than managing chaos.
Keep the race narrow enough that cattle can't turn around. This sounds basic, but a lot of lifestyle block setups end up with races that are marginally too wide, and one animal turning in the race creates a log jam that's genuinely difficult to sort out alone. Check the sizing for the breeds you run, not just average cattle dimensions.
A drafting gate that you can operate from a fixed position is valuable when you're alone. Having to move around to sort animals adds time and exposure. Ideally, you should be able to stand at one point and direct animals into two or three different exits without shifting your feet. If your current setup has you running from one end of the yard to the other to draft, that's worth fixing.
Build the Same Routine Every Time
Working alone means there's no one to catch the thing you forgot. Routine is the substitute for the second set of eyes.
Before animals enter the yard, do a quick walk of the system. Every gate that should be closed, check that it's closed. Every latch, flick it. If you're loading onto a truck or working on a ramp, check the connections and make sure the ramp is set before your stock are anywhere near it. It takes three minutes, and it removes the scenario where you're trying to secure something with a mob of cattle already in the race.
After a shift, particularly a difficult one, take a minute to notice what made it harder than it needed to be. Was there a gate you had to go around? A latch that took two hands? A corner where you kept finding yourself in a position you didn't want to be? These are fixable things, and fixing them compounds over time. The farmer who iterates their setup based on what they actually experience is the one who's still working comfortably at sixty.
Get the Setup Right Before You Need It
The worst time to realise your yard doesn't work for solo handling is when you've got forty head in it and no one else around.
If you're running cattle on your own regularly, your yard setup should reflect that. The right layout, the right crush, a forcing pen that works with animal behaviour rather than against it. These aren't premium upgrades. They're the practical minimum for working safely and efficiently by yourself.
If you're not sure whether your current setup is actually working for you, or you're looking at putting in something new, flick us a message. We're based here in New Zealand, and we talk to farmers doing exactly this kind of work every day. We'll give you straight advice on what makes sense for your block, your stock numbers, and the way you actually work.